Travel Gadget Review – Nikon D7000 DSLR
It’s always tough to review such a hot item in the current market. People are eyeing on your review hoping to get more information and finding on the product before they could decide to whether go ahead to buy it. There are also people who have actually decided to buy the camera but like more supports from others. Or even funnier is those who have actually bought the camera but still need others’ positive reviews to make them a happier buyer! In view of these reasons why people are reading reviews, I decided to review the Nikon D7000 DSLR in a positive ways! (cause I’m also a happy owner of D7000! 🙂 )
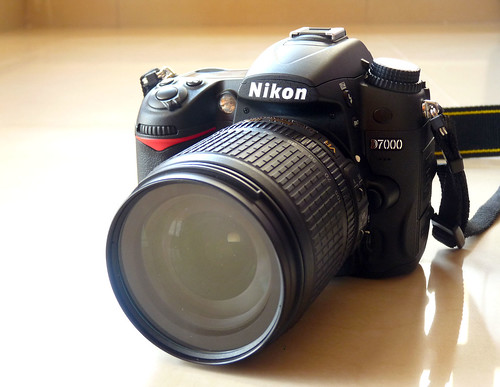
I’m reviewing Nikon D7000 as a photo taking gear on travel. I’ve been using Nikon D60 for 2 years on my travel around the world (or rather a few cities in this world) until I’ve used it to its limit and decided to upgrade. I was looking at both Nikon D90 and D300s as my next upgrade. D300s is good for everything but too heavy to carry along travel as I’m a light traveler. D90 is good for its image quality and it’s compact size and light weight, but was due for replacement (already 2 years old). So rather than picking either one of them, I decided to wait. I was waiting for the D90’s replacement, hoping that the replacement model would be better and still as compact and light. When Nikon D7000 was announced 2 months ago, I knew I was correct! Its specifications was way beyond my expectation! In fact many of its features are even outshining those of the D300s. So I was waiting, and waiting until I finally got it in my hands last week. After 10 days of using it, I have no regret at all and it certainly fulfills my every need as my next photo taking gear on my future travel!
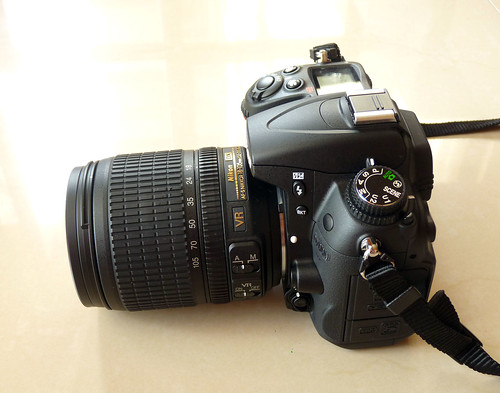
Let’s see why I said so. I’m neither a professional reviewer nor a tech savvy. So I’ll leave those detail technical analysis to dpreview. I’m going to review on how it performs as a camera for travel and how it feels in my hands after using it for the past week. And I can tell you that it is the perfect Nikon DSLR for travel so far!
Let’s make this clear. All pricier Nikon DSLR’s are in certain manners performing better than D7000, no doubt about it. But they are all too heavy for travel and all are due for replacement very soon. If you are planning to upgrade your D60, D3000, D5000 or D90 now, D7000 is the camera to buy with those latest technologies. Always buy the latest model, if they are great, instead of buying phasing out model that will lose its ground in the short future. We are in the digital era and we are buying digital product that technology advancement does make the difference. Let’s imagine this: Will you still buy Nikon D3000 now even though it was released only 1 year ago? Will you buy D5000 that was launched a year ago but had stopped production, or the latest D3100 for cheaper price but features higher specs? The answer is very clear.
Let’s make another point clear. All decent Nikon DSLR can deliver great photos, if you know how to use them. My D60 did not fail me either. It can deliver decent travel photos for my needs as long as working within its limits. Higher ranged DSLRs are better in the sense that they are easier to achieve what we want and faster to operate, with slightly better dynamic range to deliver more highlight and shadow details, but they are normally costlier and heavier. The more important factor is the user behind them. They do deliver bad result if the photographer doesn’t know what he is doing!
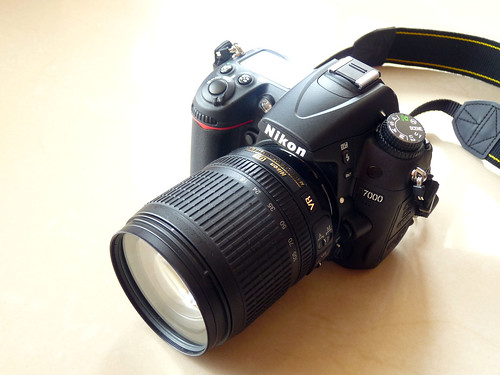
OK. Let’s come back to my D7000 review. In general, it is right in its range as an advanced amateur DSLR. It is easier and faster to deliver decent photos than its cheaper sibling such as D3100, but slightly slower and less easier to operate than its semi-pro sibling, the D300s. The great thing is that it is another Nikon. It produces same high quality image as other Nikon DSLR. It’s differences from other are mainly its additional features and its artificial intelligence. As I highlighted some of the D7000 features that made history within Nikon DSLR, I will start off with those features and see how it perform in my real life shooting as a travel photography hobbyist!
- New 16.2MP APS-C format CMOS image sensor. In general, more pixel count means more details can be captured. You won’t see them in screen size photo unless you zoom into 100% to see all these details. Also, squeezing in more pixel into the same DX sized sensor, it will increase the possibility of more noise since smaller protons absorb lesser light, in theory. For this case, yes. Nikon D7000 does reveal more details with higher resolutions in my test photos. And no. There isn’t any more noise noticed as well! Hooray! Most importantly, the image is pin sharp as well!
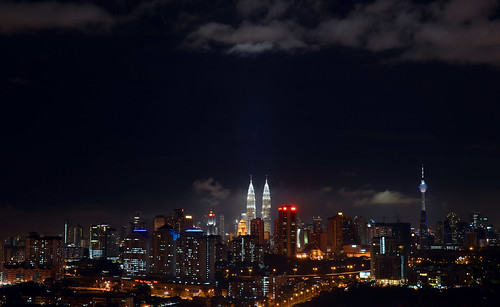
Kuala Lumpur city skyline at night. Shot with Nikon D7000 and Nikkor 35mm f1.8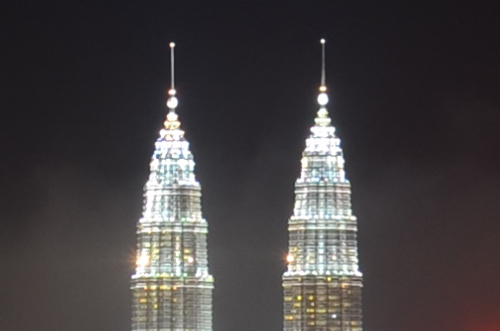
100% crop from 16.2MP file.
100% crop from 10MP file. Shot with Nikon D60 and Nikkor 35mm f1.8 - New 2,016 pixels RGB sensor. With doubling the RGB sensor pixel density, light source data collected for metering on exposure and colour rendering should be more accurate, in theory. I’ve tried on various scenes under different light source and concluded that in actual shooting, yes, Nikon D7000’s IQ in deciding exposure is very accurate. In general snapshot taking on travel, Matrix metering is mostly sufficient. With helps of its higher dynamic range, photos are generally brighter than my previous D60. Its colour reproduction is also very close to what I see in actual.

One thing I noticed is its skin tone has a slight tint of orange when I used Standard Picture Control setting.
- New 1920 x 1080 Full HD video recording. In .MOV format, D7000’s video quality is reasonably good. It’s not ideal for fast moving action with its 24FPS frame rate. Otherwise, recording podcast on travel is easy with this camera. I can now safe some space in my luggage for not carrying my Lumix FZ28 along for HD video shooting. Your hands have to be steady holding the camera while recording and you need more SDXC cards for this purpose. I shot this sample video in the rain for 43 seconds and it already took up 110MB of my memory card’s space!
Another video sample recorded in Batu Caves. My hands were shaking and the Nikkor 18-105mm lens’ VR seemed not functioning in video recording… 🙁
- 2 Auto White Balance, AWB1 and AWB2. This is something new in DSLR history. White Balance is the feature exists only in digital camera. Lights are captured by image sensor and its colour temperature is analyzed by the image processor with helps from the RGB sensor in DSLR to calculate back the rest of the image colours based on the white point in the image. AWB is then a feature to automatically keep white colour as white, being undisturbed by whatever ambient lighting. D7000 can now doing this better with its new 2,016 pixel RGB sensor. Used to be tricky lighting to meter correctly for my D60, overcast weather and warm indoor ligthing can now be easily sensed by D7000 and produce more accurate colour. Some old style photographer may still love or too used to the previous colour cast under warm or Incandescent lights. So Nikon decided to add in another AWB2 into D7000 which will keep white as yellow under warm ambient lights. Either to use AWB or AWB2 is up to personal preference. I prefer something in between. So I added A1 to my AWB fine tuning. 🙂

White Balance set to AWB1
White Balance set to AWB2Hint: AWB2 can act as another WB preset to add a bit of warmth to an image with dominant yellowish objects, even under natural sunlight!

White Balance set to AWB1
White Balance set to AWB2 - Double SD memory card slots. This is very useful to organise my photos on travel! I can now store 2 16GB SDHC into both slots and set the 2nd card as backup. By doing this I can save luggage space to bring along either a laptop or media player to backup my photos! I can also set it as separate memory card for video only! Brilliant idea Nikon!
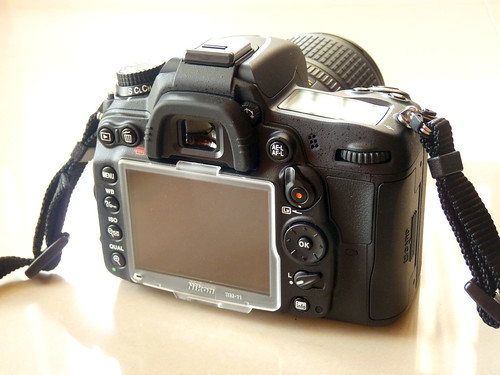
Is that all? Not quite. Let’s compare D7000 with its predecessor D90. First let’s check on its external quick access buttons available. At a glance on its back, those buttons are quite standard with other Nikon’s. A row of buttons on LCD’s left and some others on its right. If compared to its predecessor D90, a dedicated Live View Selector was added with with a red dot on its centre. Another Video Record Buttonrear Infrared Receiver is now provided at D7000 which is definitely good news for long exposure night scene photography released by remote control. That’s all from the outside. Off course there are more detail controlling with each button now than D90. You may wish to check out the Nikon D7000 Digitutor online for more details.
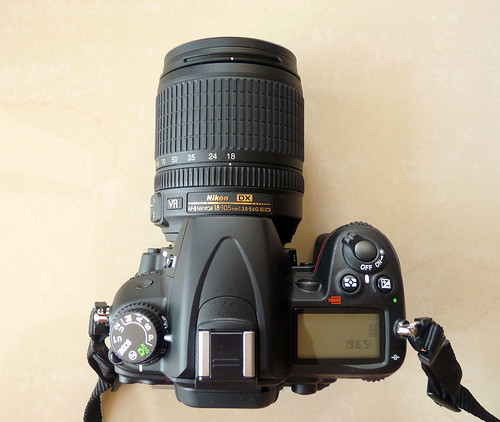
There is a new Release Mode Dial on top of D7000 body, just beneath the Main Mode Dial. D90 has this Release Mode on its right with a button to press and select by rotating the command dial. But D7000 has more functions built in! I can also choose to either release the shutter quietly (I mean it’s really quiet), or lock up the reflection mirror! But I can’t set timer together with mirror lock-up. Uhmmm…

An additional AF-mode button is now available in front slightly lower beside the lens. By pressing this and hold, I can select both the AF modes as well as AF area with front and rear command dials quickly! The new 39-points AF area can now be set to 3D tracking for capturing kids running around. An useful button to me! Hooray! 🙂
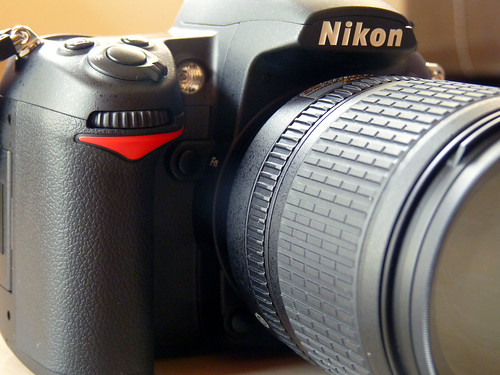
Other buttons appeared in front of D7000 are similar to D90. Nevertheless, they are more powerful now! Both Function and Preview buttons are now customizable to works differently! You can even swap their places if you don’t like where they supposed to be!
There are more.
100% coverage view finder with bright pentaprism is definitely useful to me for capturing landmarks on travel. “What I see is what I get” avoids me from either guessing the actual frame or wasting a lot of frame space around certain landmarks. I can now shoot a very tight frame to just fit in the huge St. Paul Cathedral.
The new 39-point Auto Focus is fast to lock on objects. However, all points are concentrated in the centre. You can’t focus objects which are at extreme sides of the frame. Have a look at how those 39-AF-points are positioned below…

One new feature in D7000 that I found to be very useful to me is the Virtual Horizon in view finder! I have problem shooting landscape or buildings in perfect horizon by judging with my naked eyes. Not anymore! I set the Fn button as Virtual Horizon over view finder. By pressing Fn button once before shooting, I can tilt my D7000 left or right until the indicator inside my View Finder shows a perfect level!
The magnesium alloy body construction with weather sealing guaranteed a more robust body for me to use as my workhorse on travel, though my D60 did not actually give me problems even though I used it under ‘severe’ travel conditions such as on the speed boat with water splashing in, raining, extreme hot sunlight and even freezing weather!
D7000 is heavier than D90, 774g and 710g, which is much heavier than my 550g D60, but much lighter than the 932g D300s. And it is about the same size as D90 but slightly bigger than D60. D7000 sits in between D60 and D300s in terms of both weight and size, but has all features and image quality that comparable to the latter. This is what I mean by PERFECT!
Just joking. 🙂 Still no DSLR is perfect in the market now. No exception to Nikon D7000. There are some downsides (at least to me) of it. Skin tone under warm light, though looks better with lesser yellow colour cast if compared with D60, is a bit unnatural to my liking. The top control panel is too small for me to read easily. No WB information is shown in view finder. And that’s about all! 🙂
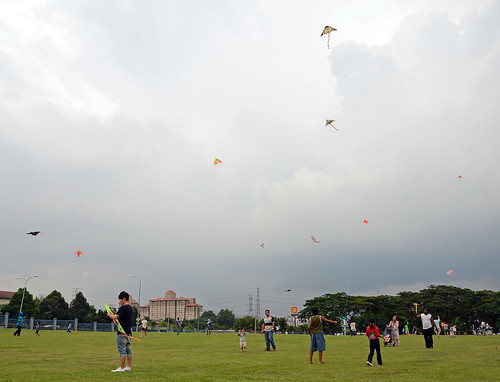
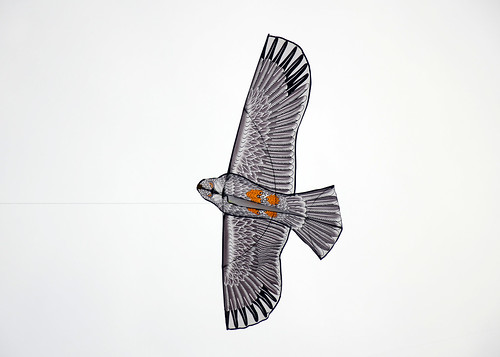
Here are some sample photos that I took over the last week.

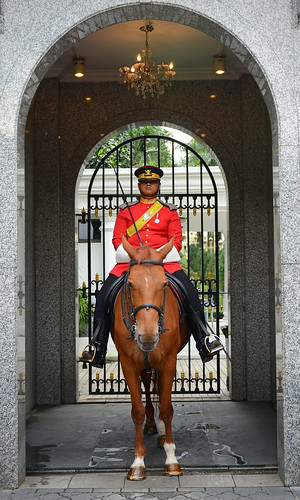

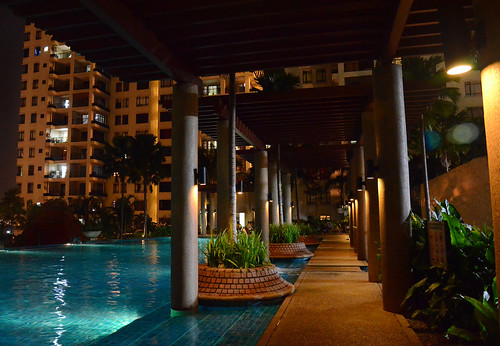
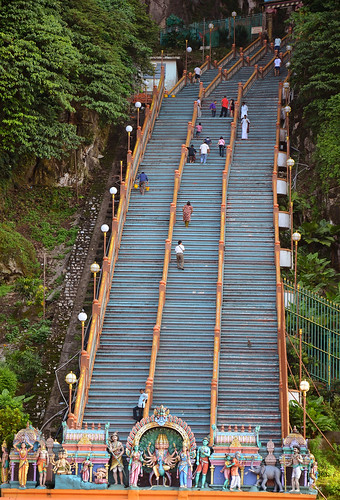
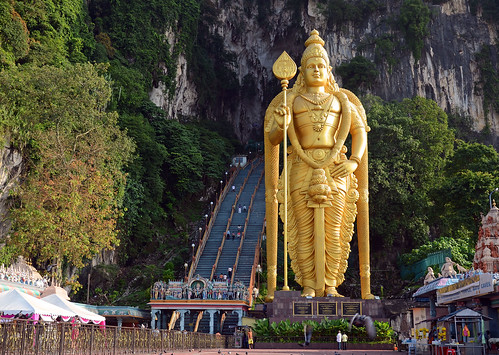
>> Click to view all other Nikon D7000 test photos in high resolution via Flickr HERE
Overall, Nikon D7000 is the best DX format Nikon DSLR that you can buy with your money at this moment. The new EXPEED 2 image processor, Nikon D7000 is super fast in action! Nikon D7000 is the most intelligent Nikon DSLR so far, if you plan to shoot with all its automatic mode such as AutoWB, AutoISO, AutoADL, Auto AF mode, and Auto Picture Control, and more. If you are an advanced user planning to control more on your shooting parameters, D7000 has enough detail settings for you to set it and even save them into U1 or U1 setting with fast recall dial! Perhaps the most important element in a DSLR is its image sensor. With the new 16.2MP CMOS sensor that delivers high resolution ISO100 images to absolutely usable ISO6400 images (though you can shoot up to ISO25,600!), what else could I expect from a DX-format camera?
I’m not traveling now but will go holidays next month with my D7000. Stay subscribed to my feeds for more travel photos taken with Nikon D7000! ![]() – Travel Feeder, the ultimate travel photo blog.
– Travel Feeder, the ultimate travel photo blog.




it’s nice to see another ‘real-world’ review of D7000. i will put this to my blog
- November 21, 2010thanks for sharing
hi there..
its a very great opportunity to read this review on D7000. I just own it, my 1st DSLR, well, for my new year..:)
I wan to ask one question about’how to produce sharp images’by using the kit lense 18-15mm? I had problems with this. What is the setting? Thanks.
- January 17, 2011typo.. * 18-105mm.. 🙂
- January 17, 2011@Kish,
- January 17, 2011Congratulation on your decision to buy this mighty dslr, my favourite Nikon D7000. 🙂
Since it is your first DSLR, may I ask how and when you found it to produce less sharp images? As far as I’m concerned, the kit 18-105mm lens does produce very sharp images, even in slow shutter speed with the help of its VR feature. Off course, you can also boost your image sharpness by increase your D7000 sharpness setting in Picture Control to 6/9, as oppose to its default setting of 3/9. Other than that, I don’t see any problem of getting sharp images from the kit lens, as long as your focus point is at where you want it and your hand is reasonably steady. Hope this help and clear your doubt. 🙂
Hi Cecil,
Thanks for sharing your Nikon D7000 review! It’s good to read reviews from ‘real’ people from this part of the world.
I have rented the D7000 over Chinese New Year and I agree that it’s a great camera which offers lots of possibilities.
One thing however which irritates me, is that my asian skin tone looks yellowish and unnaturally ‘flat’ and flawless when shooting JPEG. My lips are as yellow as my face and I overall look sick on all the pictures. On the same day, pictures of me taken with a Canon DSLR rendered a more desirable skin tone (lips, cheeks look more ‘red’, well, I look alive :-). My European friend on the other hand looks a little pink/red on the Canon shots and looks great on the Nikon shots. Life is unfair.
I understand that you made the same observations on your shots. Have you been able to solve this? Has anyone else any idea how to correct this? I hope it can go without extensive post-processing though…
Thanks for your tips!
- February 7, 2011@Astrid,
Yes. D7000 render skin tone differently from Canon and even ‘old’ Nikon. This I think is something to do with its in-camera post processing software. Its RAW file doesn’t have this issue which you may check out in dpreview. Are you using Nikon dslr before? I upgraded from my D60 and found that by adding the same amount of Amber to D7000’s WB setting, skin colour will turn out too yellowish, especially under warm lighting. So it would be best to leave D7000’s WB setting to its default or shoot in RAW. Or you may also try the Natural setting of Picture Control which will again render skin tones naturally.
- February 9, 2011This is what setting I’m using now and so far its JPEGs are acceptable to me. 🙂
Kudos. Love the review. Straightforward and serves as an alternative to a much formal and official review of DPreview.com and alike. Very helpful review indeed especially with samples of real street/travel photos. Must say that im looking forward to reading your next review. Because of your review, im now getting myself a D7000. Period. Thanks again.
- May 11, 2011Hello Cecil
Thanks on your cool write up on the D7000 and own this new toy now !! I was also using the D60 for about 2 years and thought of this upgrade.
I have a serious issue with white balance and will appreciate your inputs on this. I have been using the Prodisk to measure white balance and used it extensively with my D60.
I usually use the prodisk right is front of the lens and shoot to the source of light .. thats it .. D7000 wont even recognize this value .. Y
Now, D7000 wont see this the way the D60 did. D7000 needs a gray card or a white object to use it as a WB-PRE.
Any way of getting around to using the PRODISK with the D7000?
Regards
- May 11, 2011Vijay
India
Hi Vijay,
I haven’t tried the Prodisk WB filter before so I can’t comment on that. What I do agree with you is that D7000 sense and calculate lighting and colour different from D60, D90 and even D300s, since it’s using a totally different and new RGB sensor. Whether it’s better or worse depends on personal preference. I would say some are better and some are worse in terms of colour accuracy in AWB. 🙂
- May 11, 2011Dear Cecil
- May 12, 2011Thanks for your prompt reply and your views in the use of Prodisk with the D7000. I guess the only way around would be to use the AWB 🙂 and use viewNX to correct it. I was more than satisfied with the D60 performance using prodisk. Hardly any corrections i had to make and always loved it that way.
I guess shooting in different environment will be an issue as far as Wb and Color temperatures are concerned.
Will keep watching you pages.. cool
regards
Vijay
can i know the price ?
- July 14, 2011@Helmy,
Its price is much lower now if compared with last year when it launched. Should be in the region of RM4,000 with kit lens, if you are coming from Malaysia. 🙂
- July 14, 2011Gonna go and upgrade my D3000 to D7000 soon! Reading your post makes me really excited!! Hehehehe 🙂 Can’t wait to get my hands on the new toy!
Great review!!
- August 22, 2011Looks like a nice camera, but I don’t think I’d ever ditch my Canon for a Nikon.
- November 18, 2011